Measuring Guide
1.What you need
2 x different coloured pens, paper (use our gridded paper print out), tape measure or laser measure & a camera.
2. Draw the floor plan:
Draw the shape of the room in one colour. All dimensions to be be done in second colour.
All measurements to be in centimetres (cm).
Please note, it doesn’t need to be to scale, we will do that for you.
You will need space to draw two rows of dimensions on the floorpan. The outer line is for the overall dimensions and the inner lines is for the incremental dimensions.
Please see below for examples
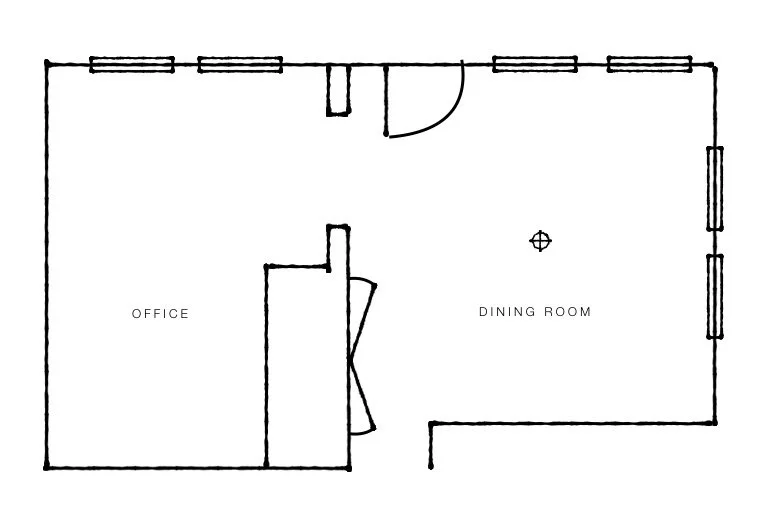
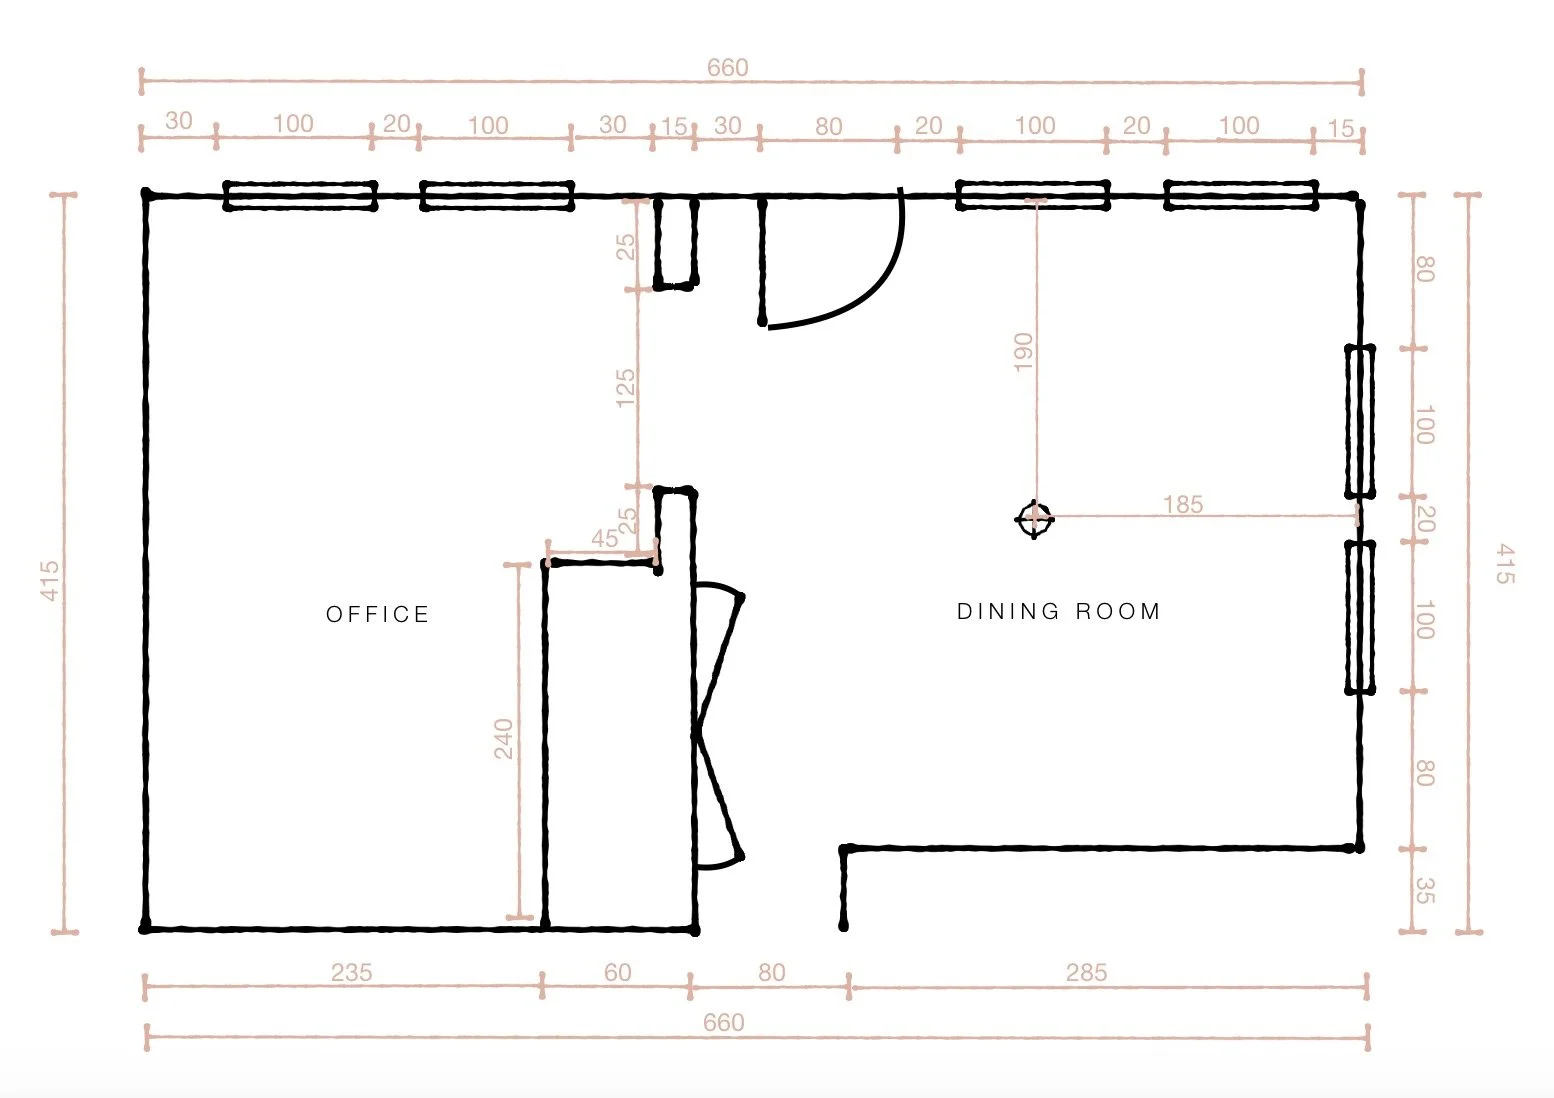
Start in one corner of the room and work your way clockwise around the room. Label each wall A, B, C, D going clockwise.
These labels can be used against the corresponding elevation.
Please show the locations of: Doors, windows,radiators, fireplaces, ceiling lights (not spot lights), fixed furniture / cabinetry that you are keepign & floor sockets.
Please also show the direction that doors/windows open, if into a room.
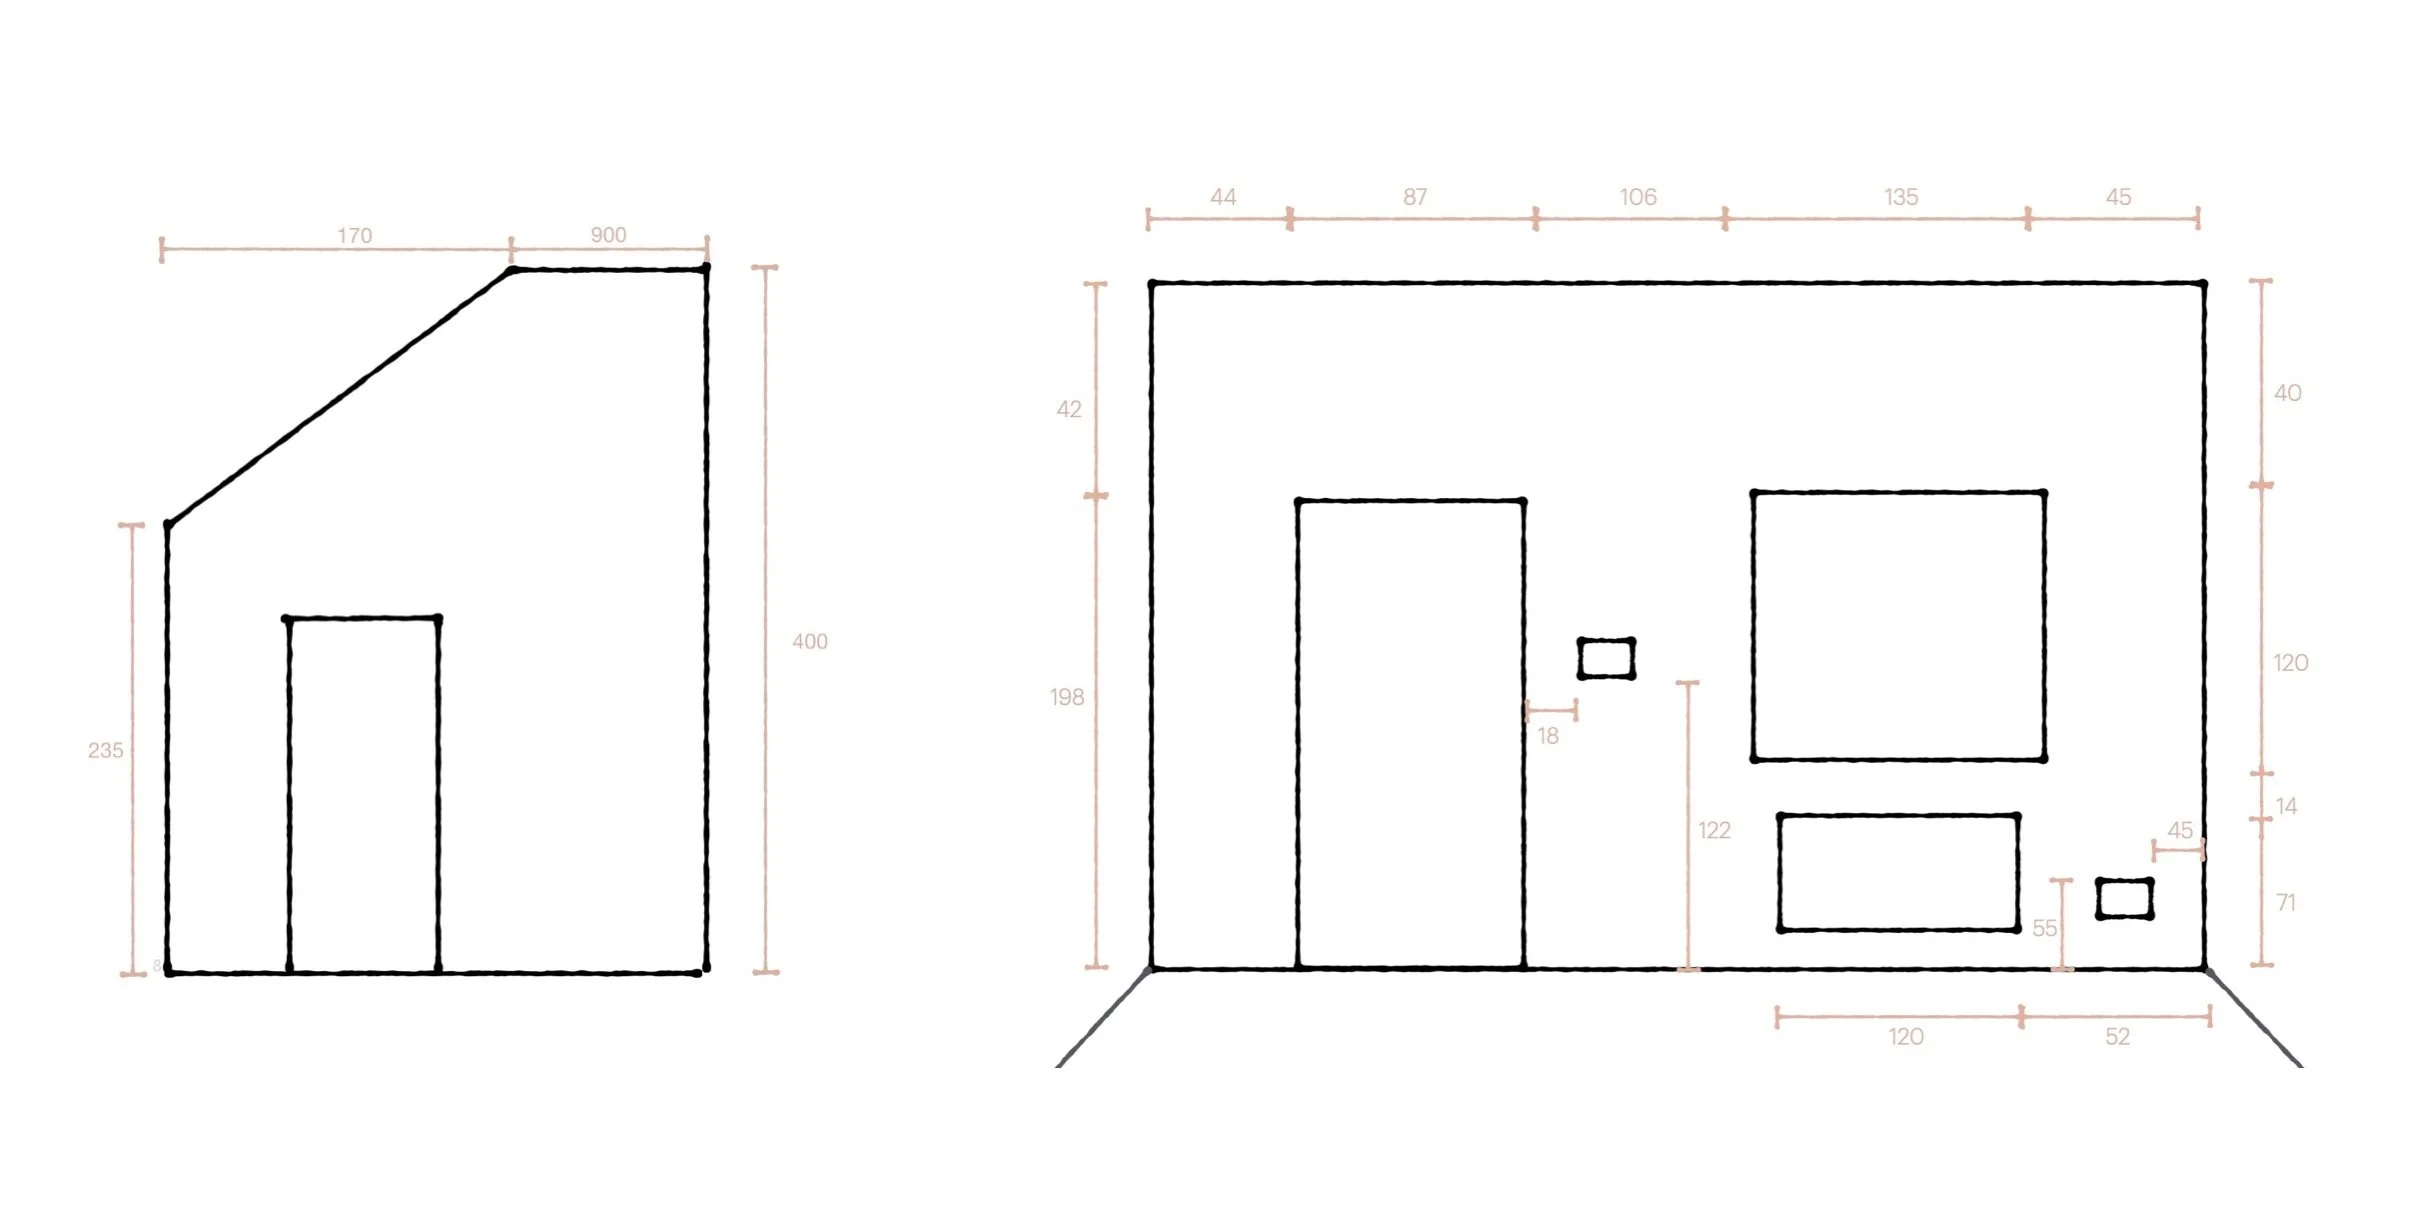
3. Draw the elevations
We need one elevation per wall.
Please note the following additional items if required: Switches, sockets, alcoves, radiators, light fittings, doors, windows, fireplaces, TV’s (if in fixed position), skirting & ceiling heights.
When recording ceiling heights, if the ceiling is sloped, please note the lowest and tallest dimension of the slope.
4. Furniture/ Artwork / Lighting etc you are keeping
Please send us photos & sizes of any large items that you would like included in the scheme that you already own.
5. Photographs
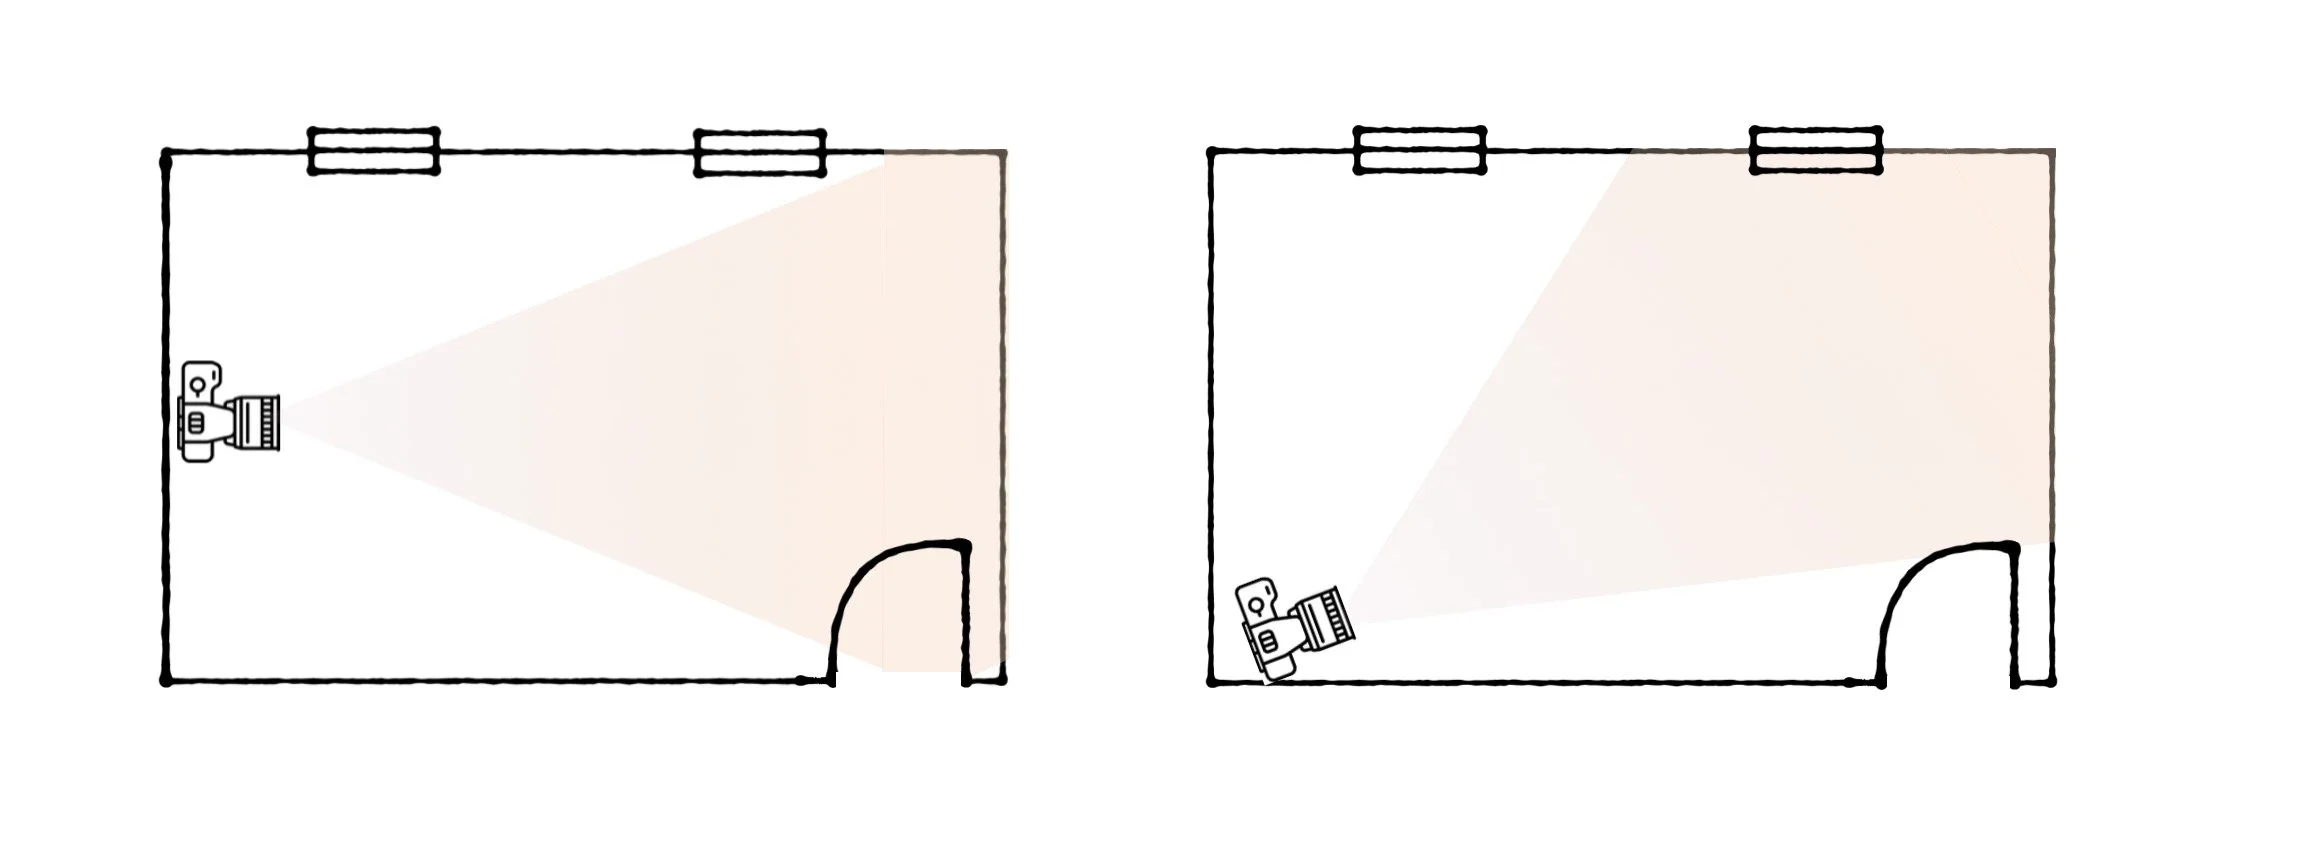
We need clear photos from each angle of the room. Please stand with your back to the centre of a wall and photograph the opposite wall straight on. Do this for each wall. Please then repeat standing in each corner.
Please take photographs in the daylight if possible, as this helps us to establish colours of any finishes, ie flooring, that may remain. Try to capture part of the floor and ceiling in each photo.